
Operating your community gate should be seamless and convenient, especially when you’re in your car. Programming your community gate remote to your car’s built-in system offers exactly that – effortless access without fumbling for a separate remote. This guide will provide you with a comprehensive understanding of how to program your community gate remote to your car, enhancing your daily convenience and security. As an auto repair expert from cardiagnostictool.store, I’ll walk you through the process, ensuring you have the knowledge to tackle this task with confidence.
Understanding Community Gate Remote Programming Basics
Before diving into the programming process, it’s crucial to understand the fundamentals of community gate remote systems. Unlike personal garage door openers, community gate systems often serve multiple residents, requiring a robust and secure access control mechanism. These systems typically involve a receiver unit at the gate entrance that communicates with your remote transmitter. Programming your remote essentially means teaching the receiver to recognize your remote’s unique signal.
The core components involved in this process are:
- The Remote Transmitter: This is the handheld device you use to send a signal to the gate receiver.
- The Receiver Unit: Located at the community gate, this unit receives signals from remotes and activates the gate mechanism.
- Your Car’s Built-in System (Homelink or similar): Many modern vehicles come equipped with a built-in system that can learn and store remote control frequencies, allowing you to integrate devices like gate openers directly into your car.
Understanding these components is the first step towards successfully programming your community gate remote to your car.
Why Program Your Community Gate Remote to Your Car?
Integrating your community gate remote with your car offers several significant advantages:
- Enhanced Convenience: No more searching for a separate remote. Control your gate directly from your car’s dashboard, making entry and exit smoother.
- Increased Security: Having one less item to carry reduces the risk of losing or misplacing your gate remote.
- Streamlined Access: Especially useful in inclement weather, you can operate the gate without rolling down your window or stepping out of your vehicle.
- Modern Integration: Utilizing your car’s built-in technology provides a clean, integrated solution compared to clip-on or visor remotes.
For residents of gated communities, programming your gate remote to your car is a worthwhile upgrade that adds both convenience and a touch of modern technology to your daily routine.
Tools You Might Need
While the programming process is generally straightforward, having the right tools on hand can make it even smoother. Typically, you won’t need specialized tools, but these items can be helpful:
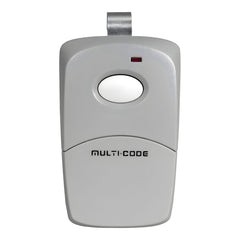
- Your Community Gate Remote: Ensure it has fresh batteries and is functioning correctly.
- Your Car’s User Manual: This is crucial for understanding how to access your car’s built-in programming system (like Homelink).
- A Second Working Remote (Sometimes Required for Rolling Codes): Depending on your gate system type (rolling code), you might need an existing programmed remote to learn the signal.
- A Screwdriver (Potentially): For accessing dip switches on older remote models or receiver units, although less common in community gate setups.
Having these items prepared will ensure you’re ready for any step in the programming process.
Step-by-Step Guide: Programming Your Community Gate Remote to Your Car
The exact steps to program your community gate remote to your car will vary depending on the type of remote (dip switch or rolling code) and your car’s specific system. However, here’s a general guide covering the most common scenarios:
Identifying Your Community Gate Remote Type
Before you start, determine what type of remote you have. The two main types are:
- Dip Switch Remotes (Fixed Code): Older remotes often use dip switches – small switches inside the remote that are set in an up or down position. If your remote has a series of tiny switches accessible by opening a compartment, it’s likely a dip switch remote.
- Rolling Code Remotes (Security+ or similar): Newer remotes use rolling code technology, which changes the code each time the remote is used, enhancing security. These remotes usually require a “Learn” or “Program” button to be pressed on the receiver unit.
Understanding your remote type is crucial as the programming methods differ significantly.
Programming Dip Switch Community Gate Remotes to Your Car
Programming a dip switch remote to your car is generally simpler:
- Prepare Your Remote: Ensure your dip switch remote is working and has fresh batteries.
- Enter Car Programming Mode: Consult your car’s user manual to understand how to initiate the car’s built-in remote programming mode. This usually involves pressing and holding one or two buttons in your car (often Homelink buttons) until an indicator light starts flashing. You might need to clear existing codes first, as per your car manual instructions.
- Transmit the Code: Hold your community gate remote close to the button in your car you wish to program. Simultaneously press the button on your gate remote and the designated button in your car. Keep holding both buttons until the indicator light in your car changes its flashing pattern, or becomes solid, indicating successful programming.
- Test: Test the programmed button in your car to see if it opens your community gate.
Dip switch remotes are programmed by matching the physical switch configuration, making the car learn the fixed code transmitted by the remote.
Programming Rolling Code Community Gate Remotes to Your Car (Two-Step Process)
Rolling code remotes require a two-step programming process due to their enhanced security features:
-
Initial Car Programming (Remote Learning):
- Prepare Remote and Car: Ensure your rolling code remote is working. Enter your car’s programming mode as described in your car’s manual.
- Transmit Initial Signal: Hold your community gate remote close to the car button and press both the remote button and the car button until the car’s indicator light changes, signaling it has learned part of the code.
-
Receiver Synchronization (Learning Button):
- Locate Receiver “Learn” Button: Go to your community gate and locate the receiver unit. It’s usually in a box near the gate operator. Look for a “Learn,” “Program,” or similar button on the receiver.
- Press Receiver “Learn” Button: Press and release the “Learn” button on the receiver. An LED indicator on the receiver should light up, usually staying lit for 30 seconds to allow programming.
- Finalize Car Programming: Return to your car immediately (within 30 seconds) and press the programmed button in your car and hold it down for a few seconds. This transmits the rolling code signal to the receiver, synchronizing your car with the gate system. You might need to press and hold the car button a couple of times as indicated by the receiver’s LED behavior.
- Test: Test the programmed car button to ensure it now opens your community gate.
This two-step process is essential for rolling code systems because the car first learns a general signal from your remote, and then the receiver is taught to specifically recognize the signal now being relayed from your car.
Troubleshooting Common Programming Issues
Encountering issues during programming is not uncommon. Here are some troubleshooting tips:
-
Remote Not Syncing:
- Check Batteries: Ensure both your gate remote and car remote system have fresh batteries. Low batteries can lead to weak signals and programming failures.
- Distance: Make sure you are within the correct range of the receiver when programming, especially for the receiver synchronization step with rolling codes.
- Clear Existing Codes: Sometimes, clearing existing codes in your car’s system before starting the programming process can resolve conflicts. Refer to your car manual for instructions on how to clear codes.
-
LED Light Not Blinking/Responding:
- Programming Mode: Double-check you are correctly entering your car’s programming mode as per your vehicle’s manual.
- Receiver Issues: If the receiver’s “Learn” button doesn’t activate the LED, there might be an issue with the receiver unit itself, requiring community management to investigate.
-
Gate Not Responding After Programming:
- Correct Button: Ensure you are pressing the correct programmed button in your car.
- Synchronization Step: For rolling code remotes, ensure you completed both the car learning and receiver synchronization steps correctly and within the time limit (usually 30 seconds).
- Compatibility: In rare cases, there might be compatibility issues between your car’s system and the community gate system. Consult your car dealer or a professional if issues persist.
Benefits of Car Integration in Community Gate Systems
Integrating your car with your community gate system provides specific advantages in a community setting:
- Ease of Access for Residents: Simplifies entry and exit for all residents with compatible vehicles.
- Reduced Clutter: Minimizes the number of remotes residents need to carry, especially when already managing keys, fobs, etc.
- Enhanced Community Security: By utilizing rolling code technology and managed access systems, community gate systems integrated with car remotes maintain a high level of security.
Maintaining Your Car-Programmed Community Gate Remote
Once programmed, maintaining the functionality is simple:
- Regular Testing: Periodically test your programmed car button to ensure it’s still working correctly.
- Battery Management: Be mindful of your car battery’s health, as the built-in remote system relies on car power.
- Re-programming if Necessary: If you change vehicles or if the programming is lost (due to car battery issues or system resets), you may need to repeat the programming process.
Conclusion
Programming your community gate remote to your car is a worthwhile endeavor that brings added convenience and security to your daily life within your community. By understanding the type of remote you have, following the correct programming steps, and troubleshooting any issues effectively, you can seamlessly integrate your gate access into your vehicle. Enjoy the ease of one-touch gate operation right from your car!
For further assistance or to explore car diagnostic tools that can help with vehicle system settings, visit cardiagnostictool.store.