In today’s fast-paced world, convenience is key. Imagine arriving home and, with a single press of a button in your car, your gate smoothly opens, granting you access to your property. Programming your gate opener to your car isn’t just a luxury; it’s a practical way to streamline your daily routine and enhance your home’s security. This guide will walk you through understanding gate remote programming and seamlessly integrating it with your vehicle.
Understanding Gate Remote Programming Basics
Before diving into the specifics of car integration, it’s crucial to grasp the fundamentals of gate remote programming. At its core, programming a gate remote involves establishing communication between your handheld remote and the receiver unit connected to your gate. This process creates a secure pathway for signals, allowing you to control your gate from a distance.
The system relies on two main components: the receiver unit and the remote. The receiver, typically housed in a box near your gate or within the gate opener itself, is the gate’s signal interpreter. It receives signals from your remote and translates them into actions, like opening or closing the gate. The remote, a portable transmitter, sends these signals upon button press.
Why is understanding this programming important? Let’s explore further.
Why Gate Remote Programming Matters
Properly programmed gate remotes are essential for reliable and secure access control to your property. It’s more than just convenience; it’s about enhancing your security and simplifying your daily life. Effective programming ensures your gate responds only to your commands, preventing unauthorized entry and adding a layer of protection to your home.
One of the significant advantages of programming is the ability to set unique codes. This customization means only devices with the correct code can activate your gate. By personalizing your code, you limit access to trusted individuals, bolstering your property’s security.
Furthermore, programming unlocks the full potential of your gate remote’s features. Many remotes offer adjustable settings like opening and closing delays, which are particularly useful for longer driveways or timed sequences. You can also implement code restrictions, such as time-sensitive access or usage limits, further refining your security measures.
Remember, gate remote programming isn’t a one-time setup. As your needs evolve – adding new users or removing old ones – reprogramming becomes necessary. Familiarity with the process empowers you to manage and adjust your gate access confidently.
Now that we understand the importance, what tools will you need to get started?
Essential Tools for Gate Remote Programming
Before you begin programming your gate remote, gathering the right tools will make the process smoother and more efficient. Typically, you’ll need a few basic items: a screwdriver, potentially a ladder (especially for garage door opener receivers which might be higher up), possibly new batteries for older remotes, and most importantly, your gate remote’s user manual. These tools will help you access the receiver unit, replace batteries if needed, and accurately follow the programming instructions.
It’s crucial to consult your user manual, as some gate remotes might have specific requirements. Certain models may need a programming adapter or a dedicated programming device to connect with the receiver. The manual provides detailed guidance on any specialized tools or steps required for your specific model.
Having all necessary tools prepared beforehand saves time and frustration, ensuring a successful programming experience. Always review the user manual thoroughly before starting to familiarize yourself with the exact steps and any potential challenges you might encounter.
With the basics and tools covered, you’re now ready to embark on programming your gate remote, potentially even to your car! Let’s start with a general step-by-step guide.
Step-by-Step Guide to Program Your Gate Remote
Programming your gate remote might initially seem complex, but with clear instructions, it becomes a manageable task. This section will guide you through the essential steps to successfully program your gate remote.
Identifying Your Gate Remote Model is Key
The first crucial step is to identify your specific gate remote model. This information is paramount because different models employ varying programming methods. Your user manual or the manufacturer’s website are your best resources for model identification and accessing the correct programming instructions. If you’re unsure, consider emailing a picture of your remote to a specialist for assistance in finding a compatible replacement or the right guide.
Once you’ve accurately identified your gate remote model, you’re well-prepared to proceed with the programming process. Make sure you have all the necessary tools ready before moving forward.
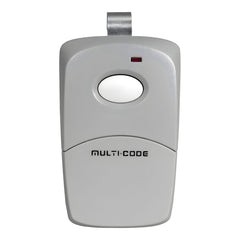
Programming Fixed-Code Gate Remotes with Dip Switches
For dip-switch gate remotes, like those from Multicode and Linear, the programming typically involves these steps:
- Locate the Receiver Unit: Find the receiver unit for your gate. It’s usually a small box positioned near the gate or inside the gate opener. Look for a wire or coax antenna extending from it.
- Find the Receiver Dip Switches: Locate the small window or compartment on the receiver unit that houses the dip switches.
- Access Remote Dip Switches: Similarly, find the dip switches on your remote, often located near the battery compartment.
- Match Dip Switch Positions: Adjust the dip switches on the remote to match the exact positions (up or down) of the dip switches on the receiver unit.
- Change the Code (Optional): If you want to set a completely new code, change the dip switch positions on both the receiver and the remote to your desired new configuration.
- Programming Complete: With the dip switches matched or newly set, the programming is generally complete.
After programming, test your remote. Stand within range of your gate and press the programmed button. If the gate operates as expected, congratulations! You’ve successfully programmed your dip-switch gate remote.
Programming Rolling Code Gate Remotes
Programming rolling code gate remotes, often found in brands like LiftMaster, usually involves a “learn” button process:
- Locate the Receiver Unit: Find the receiver unit near your gate opener, looking for an antenna as with dip-switch systems.
- Find the “Program” or “Learn” Button: Look for a button labeled “Program” or “Learn” on the receiver unit. This button activates the programming mode.
- Press the Programming Button: Press the “Program” or “Learn” button on the receiver. An LED light on the receiver should illuminate, indicating it’s in programming mode.
- Press the Remote Button: Within a short timeframe (usually 30 seconds, check your manual), press the desired button on your gate remote.
- Programming Complete: The LED light on the receiver might blink or turn off to signal successful programming.
Test your programmed remote by pressing the button while within range of your gate. If the gate opens and closes correctly, you have successfully programmed your rolling code gate remote.
Integrating Your Gate Remote with Your Car
Now for the exciting part: programming your gate opener to your car! Most modern cars with built-in garage door opener systems (like HomeLink or Car2U) can be programmed to operate gate openers as well.
To program your car’s system, you’ll typically need to consult your vehicle’s owner’s manual for specific instructions to enter programming mode. This often involves pressing and holding one or two of the built-in buttons until an indicator light blinks in a specific pattern. Sometimes, you might need to clear existing codes first, usually done by pressing and holding the two outer buttons for an extended period (around a minute, but again, check your car’s manual).
Let’s look at specific steps for dip-switch and rolling code remotes in car integration:
Programming a Dip Switch Remote to Your Car
- Ensure Remote Functionality: Verify that the dip-switch remote you intend to program to your car is working correctly and has fresh batteries if needed.
- Position Remote and Car Button: Hold your working gate remote close to the car’s built-in button you wish to program.
- Press and Hold Both Buttons: Simultaneously press and hold the button on your gate remote and the chosen button in your car. Continue holding until the indicator light in your car blinks rapidly or changes pattern, indicating successful programming.
- Test: Test the programmed car button to see if it activates your gate.
Programming a Rolling Code Remote to Your Car (Two-Step Process)
- Ensure Remote Functionality: Confirm your rolling code remote is working and has good batteries.
- Position Remote and Car Button: Hold your gate remote near the car’s button you want to program.
- Press and Hold Both Buttons (Car Programming): Press and hold both the button on your remote and the car’s button until the car’s indicator light changes, indicating the car has learned the remote’s frequency.
- Engage Receiver’s “Learn” Button: Go to your gate receiver and press the “Program” or “Learn” button, just as you would when programming a new handheld remote. Wait for the LED to light up.
- Return to Car and Activate: Quickly return to your car and press and hold the car button you just programmed until the gate activates or the car’s indicator light confirms programming (this step finalizes the rolling code synchronization).
- Test: Test the car button to ensure it consistently opens and closes your gate.
Troubleshooting Common Programming Issues
Encountering issues during programming is not uncommon. If your remote isn’t syncing, the LED light isn’t behaving as expected, or the gate isn’t responding, first re-read your user manuals (both for the remote and your car if integrating). Troubleshooting tips are often found there.
Common fixes include:
- Battery Check: Ensure both your remote and (if applicable) the receiver have sufficient power. Replace batteries if in doubt.
- Range: Make sure you are within the effective range of the receiver during programming and testing.
- Reset and Restart: Some systems benefit from a factory reset of the receiver or car’s system before reprogramming. Consult your manuals for reset procedures.
- Step-by-Step Review: Carefully retrace each step of the programming process, ensuring you haven’t missed anything.
- Compatibility: Double-check compatibility between your car’s system and the gate opener, especially for rolling code systems.
If problems persist, consider contacting a professional gate technician or the manufacturer’s support for assistance.
Benefits of Adding Your Gate Remote to Your Car
The advantages of integrating your gate remote with your car are clear: unparalleled convenience. Having gate control directly in your car eliminates the need for fumbling for separate remotes. With a simple press of a built-in button, you can operate your gate without taking your eyes off the road or removing your hands from the wheel. This streamlined access enhances your daily routine, making coming and going smoother and more efficient.
Compatibility Check: Car and Gate Remote
Before attempting car integration, verify compatibility. While many modern vehicles feature systems designed to sync with gate and garage door openers, not all are universally compatible. Check your car’s user manual for information on its built-in system and compatibility specifications. You may need to know the frequency and type of your gate opener (rolling code or fixed code) to confirm compatibility. If unsure, consulting a car audio specialist or a gate system professional can provide clarity. In some cases, you might need an adapter or a specific type of remote for seamless integration.
Maintaining Your Programmed Gate Remote System
Once your gate remote is programmed and integrated with your car, maintaining its functionality is crucial for long-term reliability.
Regular Check-ups for Your Gate Remote
Regularly check your gate remotes, both handheld and car-integrated. Inspect for any signs of physical damage, dirt buildup on buttons, or corrosion in the battery compartment. Clean the remote’s exterior and buttons periodically with a soft, dry cloth.
Dealing with Battery Issues Effectively
Battery issues are a common cause of remote malfunction. If you notice decreased range, inconsistent operation, or unresponsiveness, replace the batteries immediately. Use the correct type of batteries as specified in your remote’s user manual and ensure they are inserted with the correct polarity. For car-integrated systems, while less frequent, be aware of your car’s overall electrical health, as a weak car battery could theoretically impact the range of integrated remotes.
Conclusion
Programming your gate opener to your car is indeed possible and offers significant convenience and enhanced security. By following this comprehensive guide, understanding the type of remote you have, and carefully executing the programming steps, you can seamlessly integrate your gate control into your vehicle. Enjoy the ease and security of single-button gate operation from the comfort of your car, and remember that regular maintenance ensures continued reliable performance. Happy programming and welcome home!
To explore a wide selection of gate remotes and accessories, visit: https://elitegates.net/collections/remote-controls