Hey petrolheads! Mimin from cardiagnostictool.store is back to share some expert tips on how to fine-tune your injection motorcycle, specifically focusing on setting the ECU of your Jupiter Z1. If you’re looking to boost your bike’s performance and eliminate issues like backfiring after installing a racing exhaust, you’ve come to the right place. Keep reading to unlock the secrets!
Generally, riders opt for CO (Carbon Monoxide) setting adjustments when they replace their stock exhaust with a performance racing exhaust. This adjustment aims to enrich the fuel mixture, leading to enhanced power and smoother engine operation. Wondering which bikes can undergo CO setting? The good news is, most modern fuel-injected motorcycles are CO setting compatible. For Honda bikes, the process is known as attitude mode, offering 4 steps for customization to suit your riding needs. Suzuki models often have a simple adjustment screw on the Throttle Body (TB). However, some Kawasaki models may not support CO setting adjustments.
It’s worth noting that not all Yamaha motorcycles are created equal when it comes to CO settings. For example, the New Vixion R and R15 v3 are reportedly not CO setting adjustable, according to a Yamaha mechanic. Whether this limitation applies across all Yamaha service centers or just some due to a lack of necessary tools is unclear. We’ll keep you updated as we gather more information!
Another point to consider is that the GSX series from Suzuki also typically lacks fuel mixture adjustment capabilities. For bikes where CO setting isn’t an option, upgrading to a Racing ECU often becomes the go-to solution. Motorcycle manufacturers like Honda, Yamaha, Suzuki, and Kawasaki pre-set the fuel-air mixture in their standard ECUs to match the stock exhaust systems and engine specifications. However, when you switch to a non-standard exhaust, like a racing exhaust, the engine’s fuel requirement changes. This is where CO setting or attitude mode (to slightly richen the fuel mixture) becomes essential to maximize engine performance.
Here are common reasons why someone might consider CO setting / attitude mode / ECU racing replacement:
Let’s first dive into the reasons for CO setting before we discuss ECU replacement, as they are interconnected.
- Racing Exhaust Installation: Specifically for Yamaha bikes, replacing the stock exhaust with a racing exhaust often necessitates CO setting to prevent exhaust popping or backfiring.
- Desire for a Richer Mixture: Riders aim for a richer fuel mixture to boost engine power and improve throttle response, especially for aggressive riding.
- Cold Climate Riding: Colder environments may require a richer mixture for optimal engine performance and starting.
- Simulating Larger Engine Performance: Increasing the CO setting can lead to increased fuel consumption, mimicking the characteristics of a larger, more fuel-hungry engine.
Next, let’s explore ECU Racing Replacement:
- Increased Top Speed: Racing ECUs often remove or raise the RPM limiter, allowing for higher top speeds.
- Optimized Fuel Delivery: Racing ECUs provide finer control over fuel injection, ensuring optimal fuel delivery for various engine modifications.
- Adjustable RPM Limits: Customize the engine’s RPM limit to suit performance modifications and riding style.
- Ignition Timing Adjustment: Advanced ECUs allow for tweaking ignition timing for maximum power output.
- TPS Setting: Fine-tune the Throttle Position Sensor (TPS) for improved throttle response.
- Customizable Mapping: Racing ECUs offer a wide range of pre-set and custom fuel and ignition maps to match specific engine modifications.
ECU racing upgrades are usually considered when motorcycles undergo significant modifications like bore-ups, tune-ups, porting and polishing, camshaft changes, racing exhaust installations, and more.
Stock ECUs have fixed fuel delivery and ignition timing settings, which are not adjustable. Therefore, a racing ECU becomes necessary to optimize performance after extensive engine modifications.
How to Set CO on Yamaha Motorcycles Using FI Diagnostic Tools
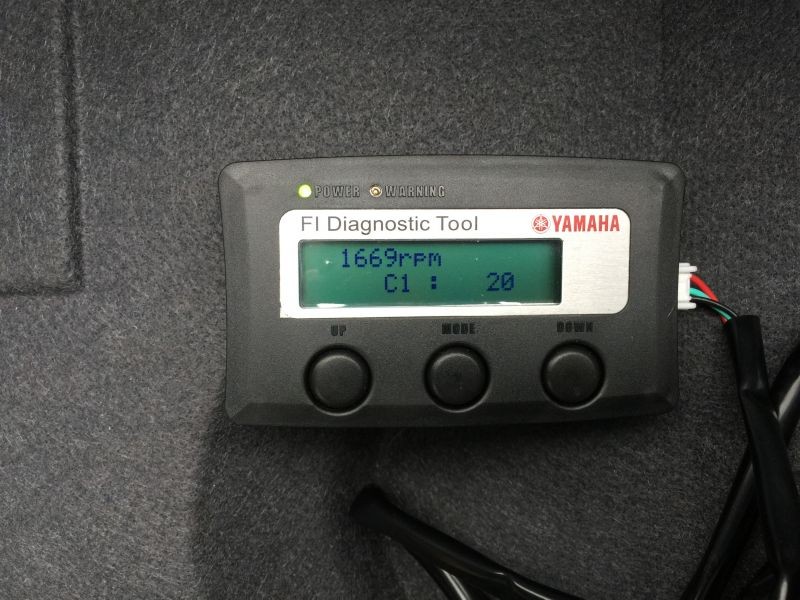
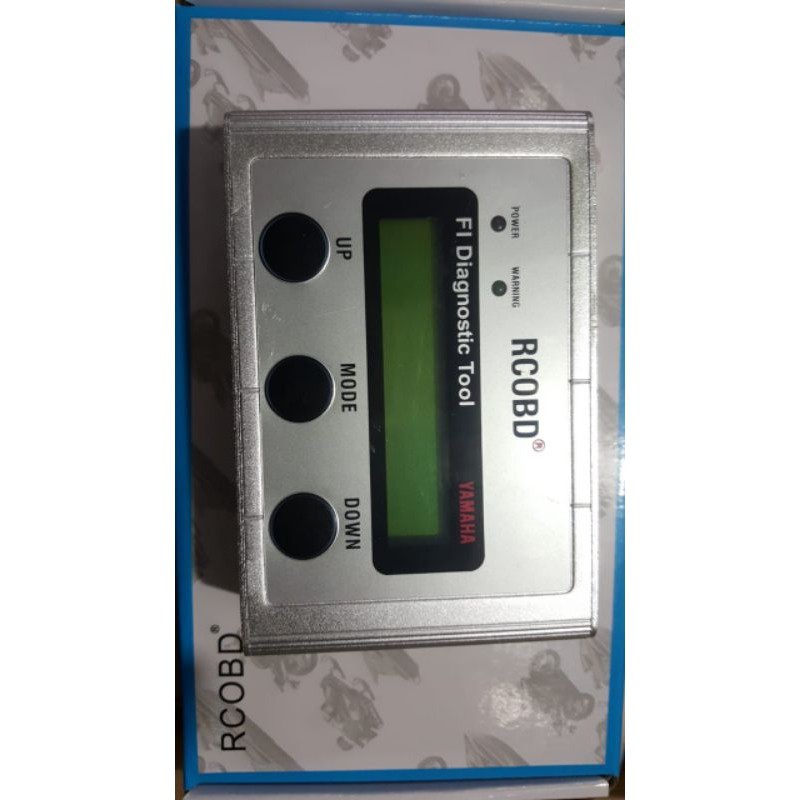
To perform CO setting, you’ll need to visit your local Yamaha service center or a well-equipped independent workshop. Ensure they possess an FI diagnostic tool, as not all workshops have this specialized equipment. Below is an image of a typical FI diagnostic tool:
An FI diagnostic tool is designed to diagnose and assess the operational status of fuel injection system components. It can detect faults within the FI system, displaying error codes numerically on its screen.
FI Diagnostic Tools generally operate in 3 modes:
- Normal Mode
- Diagnostic Mode
- CO Setting Mode
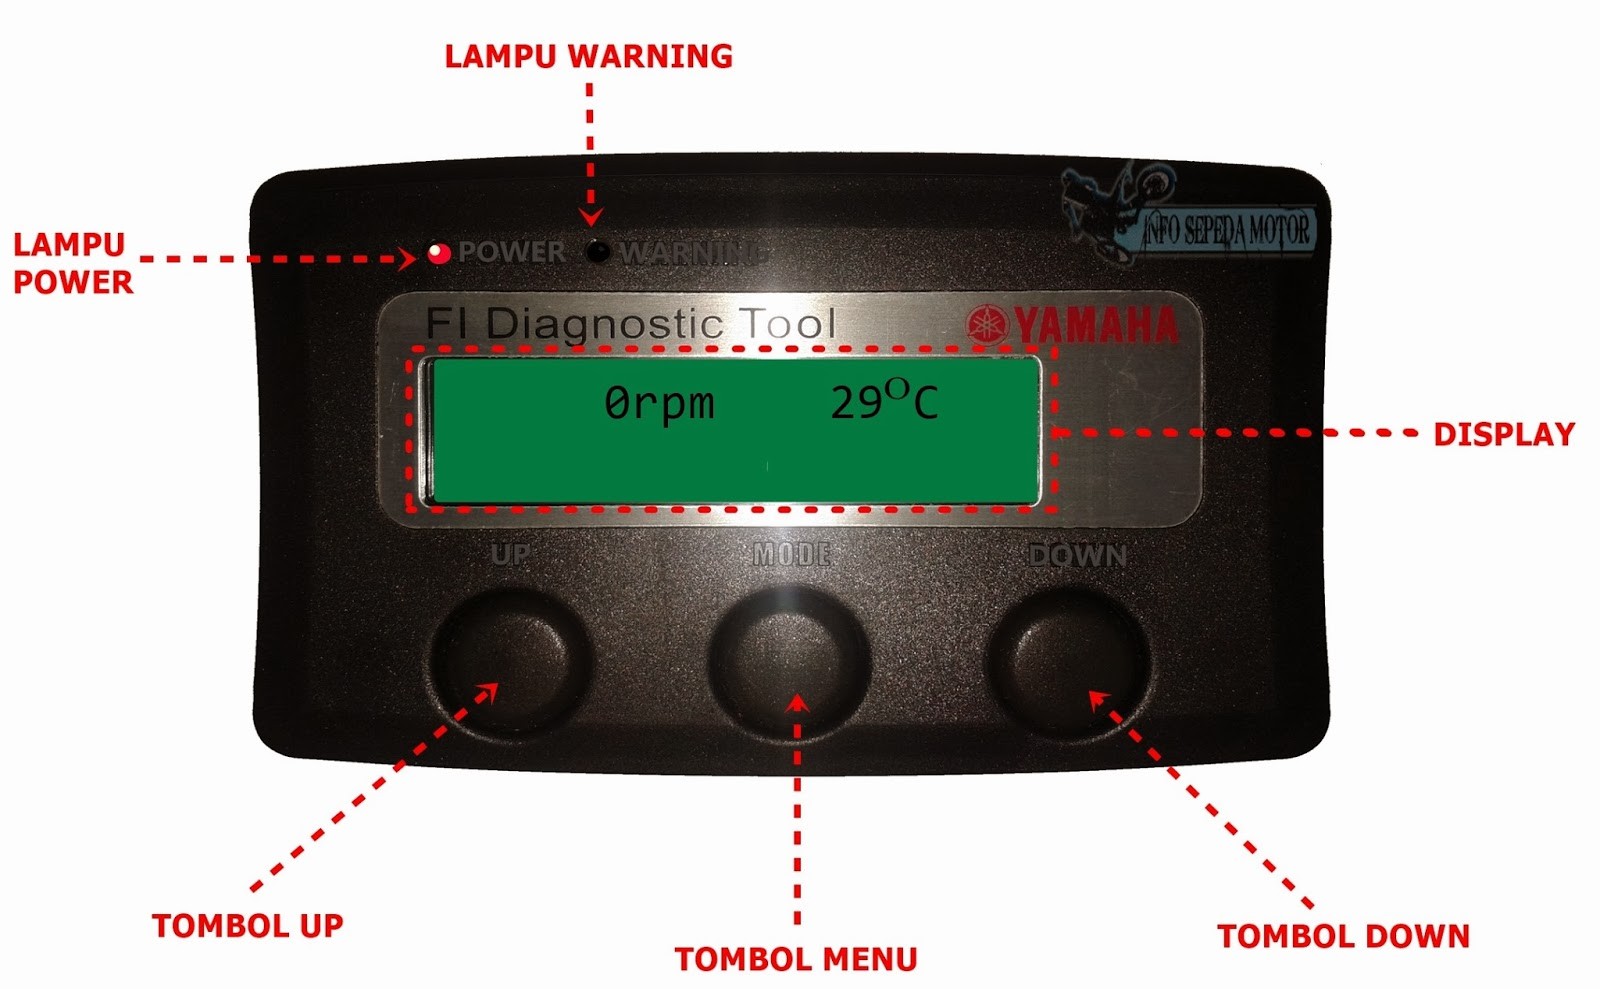
These tools are commercially available, typically priced around 2 million Rupiah (check current pricing). Using the tool involves connecting cables, usually color-coded red, green, and black. Here’s a closer look at the connection process:
Connecting the FI Diagnostic Tool
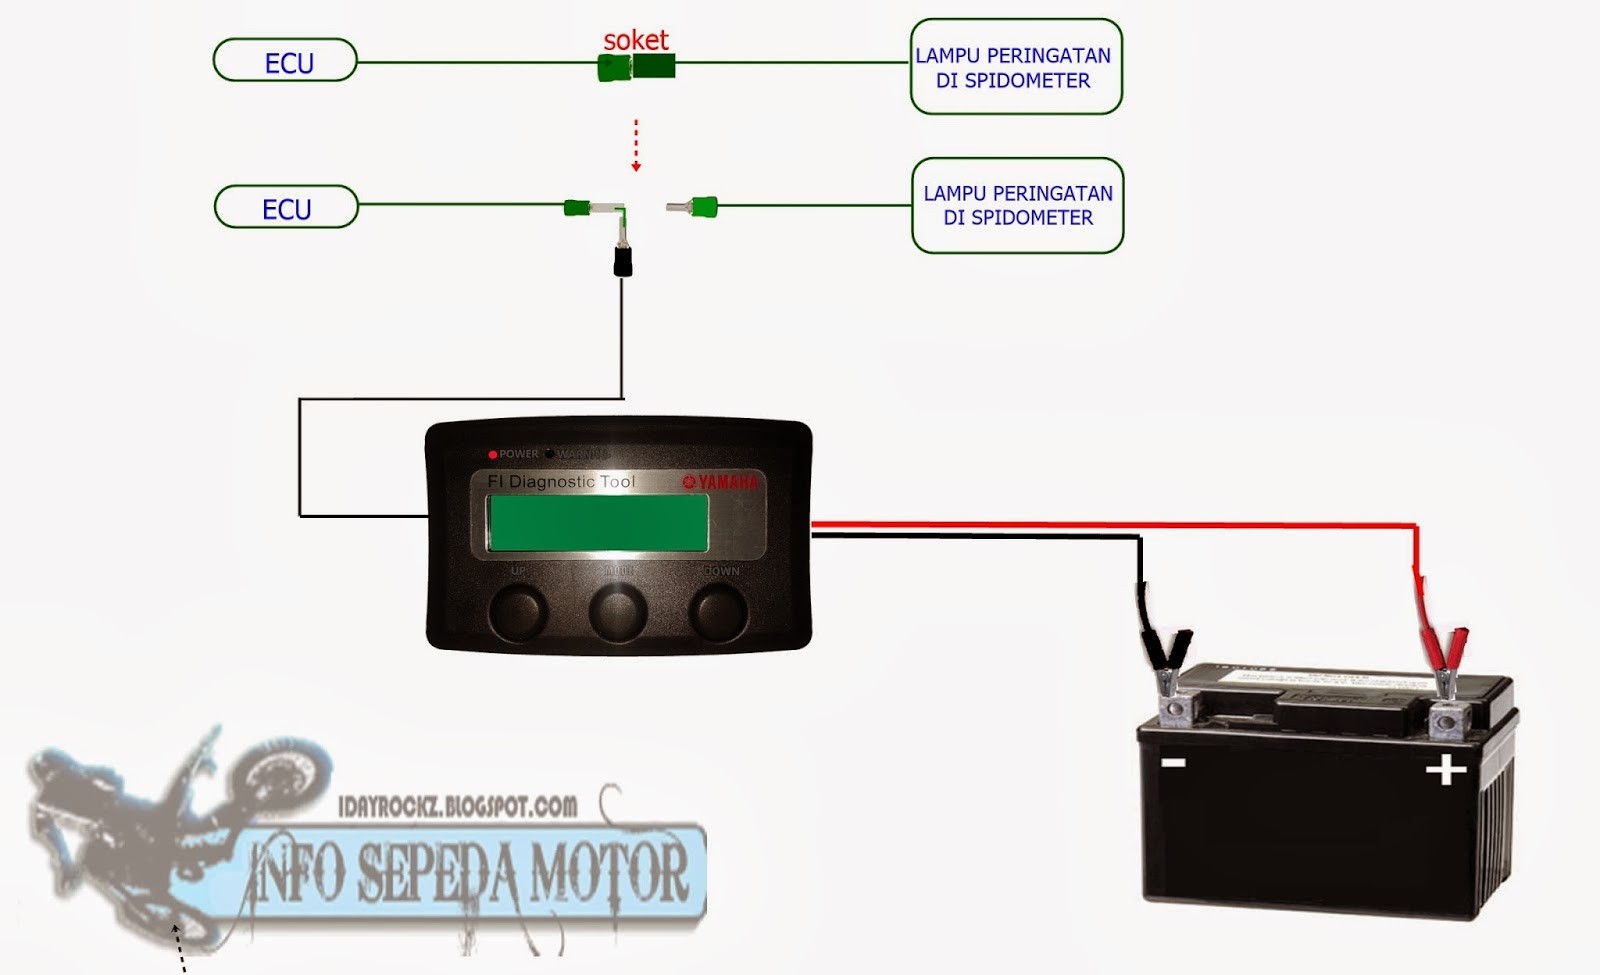
Connecting the tool is straightforward. Simply connect the tool’s cable socket to the ECU socket and then connect it to the battery. Refer to the image below for a detailed view:
Using the FI Diagnostic Tool for CO Setting
Here are the steps to use the CO setting mode:
- Connect the FI diagnostic tool cables to your motorcycle and battery.
- Once connected, turn the ignition ON and start the engine.
- Press and hold the “MODE” button.
- Press the “UP” button to select “CO” mode.
- Confirm selection by pressing the “MODE” button again.
- Start the engine.
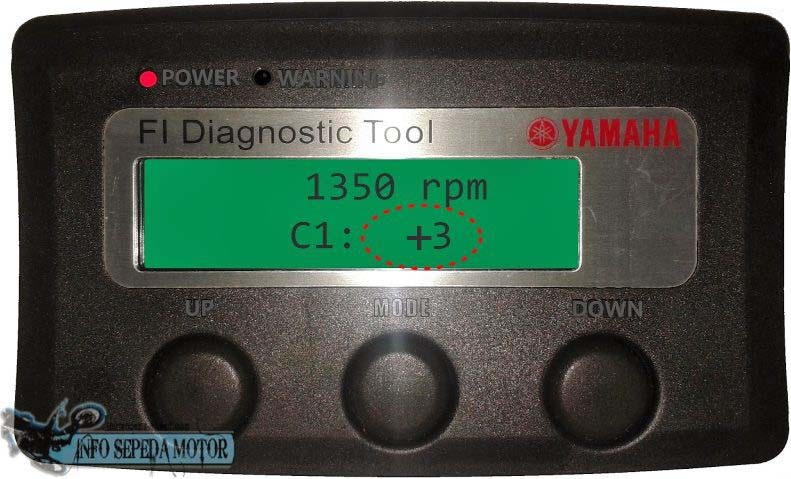
- Adjust the CO level using the “UP” or “DOWN” buttons. “UP” increases the CO level by 1 step, and “DOWN” decreases it by 1 step. Each step typically represents 0.05cc of fuel adjustment.
- Increasing by 3 steps (+3) adds 0.15cc of fuel, slightly enriching the mixture (making it slightly richer by 0.15cc), and vice versa.
Refer to the images below for visual guidance:
Ensure the ignition is ON throughout the CO setting process. Double-check the polarity when connecting the cables to the battery. Select the appropriate mode, and use the UP button to increase the CO level until exhaust popping is minimized. For a hassle-free approach, visit an official Yamaha service center, where CO setting adjustments might cost between 5,000 to 20,000 Rupiah. For a more detailed walkthrough, you can find video tutorials online on CO setting procedures.
Effects of CO Setting on Fuel Injected Motorcycles
According to Riswandi, Manager Education-Service at PT Yamaha Motor Kencana Indonesia (YMKI), increasing the CO setting by +6 or +10 will result in a slightly richer fuel mixture and increased fuel consumption. However, it also leads to a noticeable boost in engine power and responsiveness compared to not adjusting the CO settings.
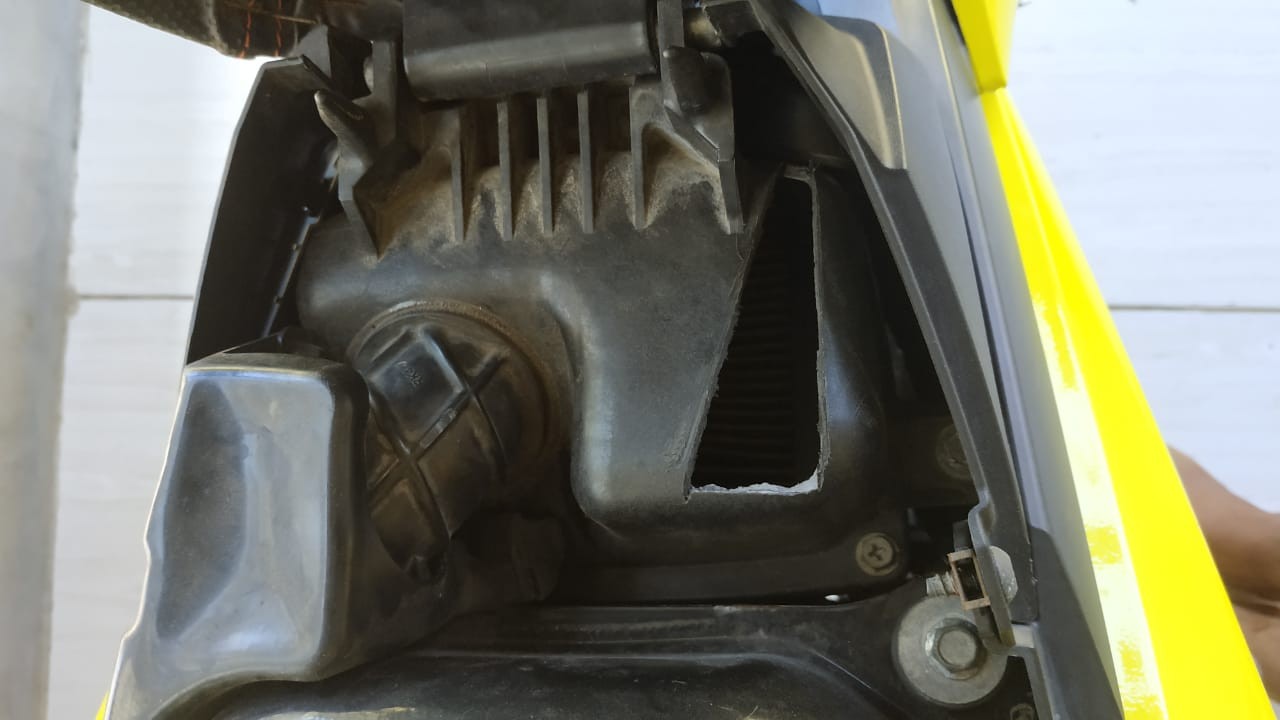
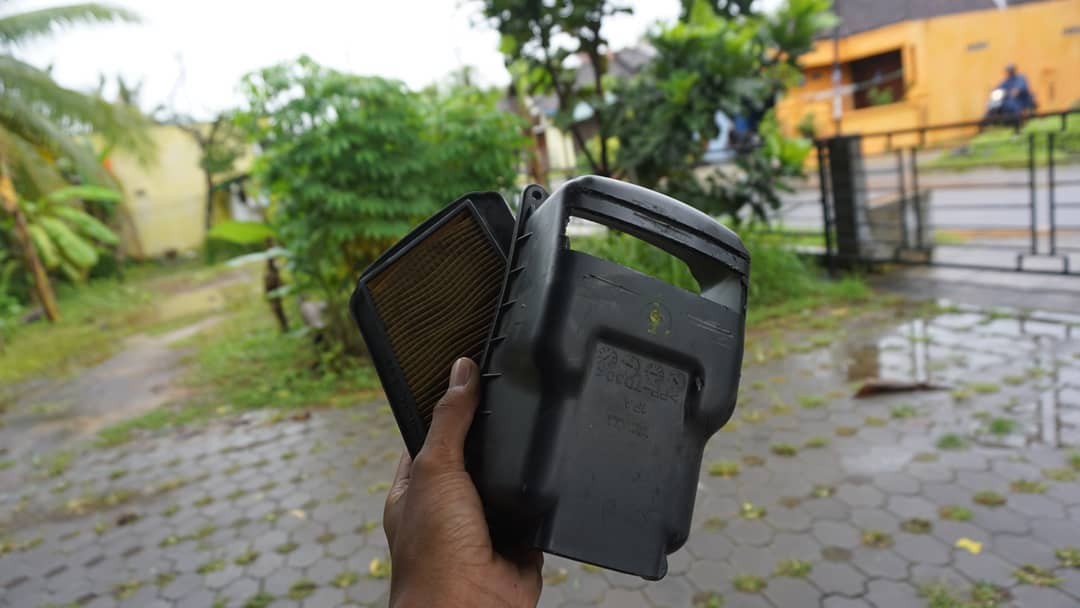
From personal experience with Yamaha New Vixion and MX King motorcycles, adjusting the CO setting to +4 and +10 made a significant difference. The engine felt more responsive, and the acceleration was noticeably improved, especially when paired with a racing exhaust and an open air filter. Curious? Try it out and experience the difference yourself!
Where to Buy FI Diagnostic Tools
| Product Image | Product Name | Product Price | Shopee Purchase Link |
|---|---|---|---|
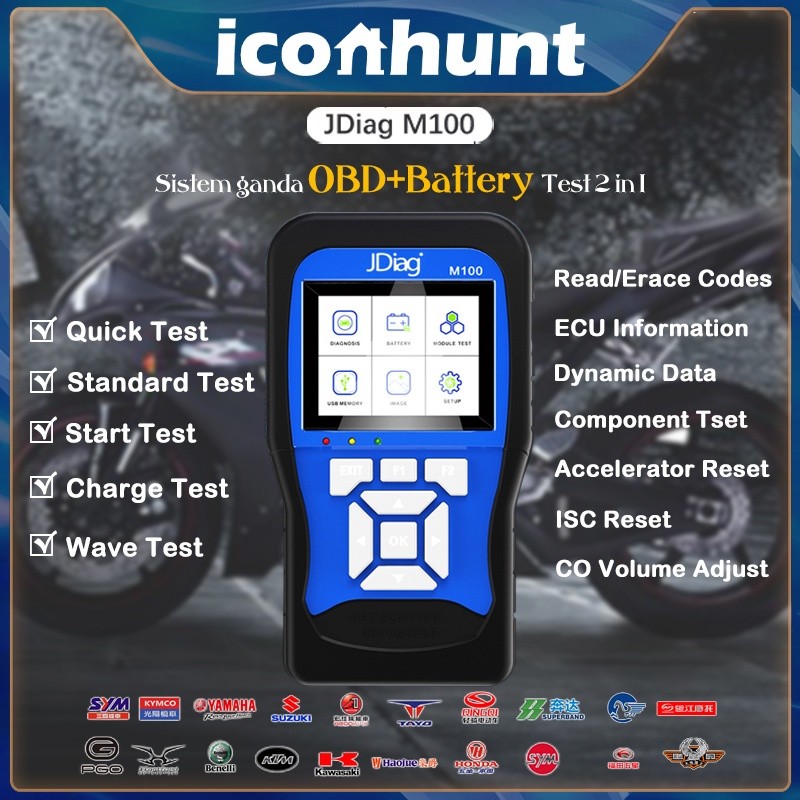
| JDiag M100 Motorcycle Scanner Function Diagnostic Tool OBDII ECU CO | Rp 1,250,000 | Buy Here | |
| JDiag M200 Full DLC Package Scanner for All Injection Motorcycles | Rp 3,195,000 | Buy Here | |
| Yamaha Fuel Injection Diagnostic Scanner Tool | Rp 1,475,000 | Buy Here |