
In today’s fast-paced world, convenience and security are paramount, especially when it comes to accessing your property. Programming your gate opener to your car offers a seamless blend of both, allowing you to control your gate without fumbling for a separate remote. This guide, brought to you by the auto access experts at cardiagnostictool.store, will walk you through the process, ensuring a smooth and successful integration.
Understanding Gate Remote Programming Basics
Before diving into the specifics of car integration, it’s crucial to understand the fundamental principles of gate remote programming. This process essentially involves teaching your gate’s receiver unit to recognize the unique signal from your remote. By establishing this communication link, you gain the ability to operate your gate from a distance, enhancing both convenience and security.
At the heart of this system are two key components: the receiver unit and the remote transmitter. The receiver, typically located near your gate motor, is the gate’s “listener,” designed to receive signals. The remote, on the other hand, is your handheld device that sends commands to the receiver, instructing the gate to open or close.
Why is understanding gate remote programming so important? Let’s explore further.
Why Program Your Gate Opener? The Benefits Unveiled
Programming your gate remote is more than just a convenience; it’s a significant step towards enhancing your property’s security and streamlining your daily routines. Proper programming ensures your gate remote operates reliably, giving you consistent access control.
One of the primary advantages is enhanced security. By programming your remote, you can set unique codes, ensuring that only authorized individuals can operate your gate. This personalized access system is a robust deterrent against unauthorized entry, adding a vital layer of protection to your home or business.
Furthermore, programming unlocks the full potential of your gate remote’s features. Many modern remotes offer customizable settings such as opening and closing delays. These features are particularly useful for longer driveways or when coordinating gate operation with other tasks. Advanced options like time-based access restrictions and usage limits further bolster security, providing granular control over gate access.
It’s also important to remember that gate remote programming isn’t a one-time setup. As your needs evolve, whether adding new users or replacing remotes, understanding the programming process empowers you to make these adjustments confidently and efficiently.
Now that we’ve established the importance of gate remote programming, let’s gather the tools you’ll need to get started.
Essential Tools for Gate Remote Programming
Before you begin the programming process, gathering the right tools will ensure a smoother and more efficient experience. Typically, you’ll need a few basic items:
- Screwdriver: Often required to access the receiver unit or battery compartment of your remote.
- Ladder (potentially): If your receiver unit is mounted high, a ladder might be necessary for safe access.
- New Batteries (if needed): Especially if your remote is older, fresh batteries can eliminate power issues as a potential problem.
- Gate Remote User Manual: This is arguably the most crucial tool. Your manual contains specific instructions for your gate remote model and receiver, which can vary significantly between manufacturers.
For some gate remote models, you might encounter additional requirements. Always consult your user manual for specifics. Certain remotes may need a programming adapter or a dedicated programming device to establish a connection with the receiver. Your manual will detail any such specific tools or steps.
Having all necessary tools prepared beforehand will save you valuable time and minimize frustration. Reading your user manual thoroughly before starting is always recommended to familiarize yourself with the exact steps and anticipate any potential challenges.
With the basics covered and tools in hand, you’re now ready to embark on programming your gate remote. Let’s move to the step-by-step guides.
Step-by-Step Guide to Programming Your Gate Remote
Programming your gate remote might seem complex, but with clear instructions, it becomes a manageable task. This section provides step-by-step guidance to help you program your gate remote successfully.
Step 1: Identifying Your Gate Remote Model
The first crucial step is to accurately identify your gate remote model. Programming methods differ significantly between models, so correct identification is paramount. Refer to your user manual or the manufacturer’s website for model information. The model number is often found on the remote itself, sometimes inside the battery compartment.
If you’re unsure or need assistance, cardiagnostictool.store’s expert team can help. You can email us a picture of your remote, and we can assist in identifying your model and finding compatible replacements if needed.
Once you’ve identified your model, ensure you have the correct programming instructions before proceeding.
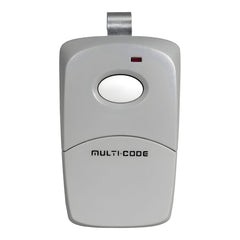
Step 2: Programming Fixed-Code (Dip Switch) Gate Remotes
For older fixed-code remotes, often identified by dip switches, the programming process usually involves matching switch positions between the remote and receiver. Brands like Multicode and Linear commonly use this technology. Here’s a general guide:
- Locate the Receiver Unit: Find the receiver box, typically near the gate motor. It may have an antenna.
- Access Dip Switches on Receiver: Open the receiver unit to locate the dip switches.
- Access Dip Switches on Remote: Open your remote to find its dip switches, often in the battery compartment.
- Match Dip Switch Positions: Set the dip switches in your remote to match the exact pattern (up/down positions) of the dip switches in the receiver.
- Change Code (Optional): To set a new code, change the dip switch positions on both the receiver and the remote to your desired new pattern.
- Programming Complete: No further steps are usually needed for dip-switch remotes after matching the switches.
After setting the dip switches, test your remote. Stand within range of your gate and press the programmed button. If the gate operates correctly, you’ve successfully programmed your dip-switch remote.
Step 3: Programming Rolling Code Gate Remotes
Rolling code remotes, offering enhanced security, use a constantly changing code. Brands like LiftMaster often employ this technology. Programming these remotes generally involves a “learn” button process:
- Locate Receiver Unit: As with dip-switch remotes, find the receiver near the gate motor.
- Find “Program” or “Learn” Button: Look for a button labeled “Program,” “Learn,” or similar on the receiver unit.
- Press Programming Button: Press the “Program” or “Learn” button on the receiver. An LED indicator light usually illuminates.
- Press Remote Button: Immediately press the button you wish to program on your remote.
- Programming Complete: The LED light on the receiver usually blinks or turns off to indicate successful programming.
Test your remote after programming. Stand within range and press the button. If the gate responds, your rolling code remote is successfully programmed.
Integrating Your Gate Remote with Your Car
Now for the main goal: programming your gate opener to your car’s built-in system. Many modern vehicles come equipped with integrated systems like HomeLink or similar, designed to control garage doors and gates.
To program your gate remote to your car, you’ll generally need to consult your vehicle’s owner’s manual for specific instructions on accessing the car’s programming mode. This often involves pressing and holding one or two buttons in your car until an indicator light starts blinking in a specific pattern. Sometimes, erasing existing codes is necessary before programming new ones, often done by holding down two outer buttons in your car for an extended period (around a minute).
Let’s break down the steps for programming both dip-switch and rolling code remotes to your car.
Programming a Dip Switch Remote to Your Car
- Ensure Remote is Working: Verify that your dip-switch remote is functioning correctly and has fresh batteries.
- Position Remote and Car Button: Hold your working gate remote close to the car’s built-in button you wish to program.
- Simultaneous Press: Press and hold both the button on your gate remote and the chosen built-in button in your car at the same time. Continue holding until the indicator light in your car changes (usually blinks rapidly or becomes solid), indicating successful programming.
- Test: Test the programmed car button to ensure it now operates your gate.
Programming a Rolling Code Remote to Your Car (Two-Step Process)
Rolling code remotes often require a two-step “learning” process when programming to a car:
- Ensure Remote is Working: Confirm your rolling code remote is working and has good batteries.
- Position Remote and Car Button: Hold your working rolling code remote near the car’s button you want to program.
- Simultaneous Press (Step 1 – Car Learning): Press and hold both the button on your gate remote and the car’s button until the car’s indicator light changes, indicating the car has “learned” part of the code.
- Activate Receiver’s Program Button (Step 2 – Gate Learning): Go to your gate receiver unit and press the “Program” or “Learn” button, just as you would when programming a new remote directly to the gate. Wait for the LED light to illuminate on the receiver.
- Return to Car and Press Car Button (Step 2 – Car Confirmation): Quickly return to your car and press and hold the car button you programmed in step 3. Hold it until the gate responds or the car’s indicator light confirms completion. This step finalizes the code learning process by communicating with the gate receiver.
- Test: Test the programmed car button to confirm it now opens and closes your gate.
Troubleshooting Common Programming Issues
Encountering problems during programming is not uncommon. Here are some troubleshooting tips:
- Remote Not Syncing: Ensure you are using the correct programming method for your remote type (dip-switch or rolling code). Double-check your user manuals.
- LED Light Not Blinking (Receiver): Verify power to the receiver. Try pressing the program button firmly and holding it for a few seconds.
- Gate Not Responding: Check remote batteries. Ensure you are within range of the gate. Try repeating the programming steps carefully.
- Factory Reset: If issues persist, consult your manuals for factory reset instructions for both your remote and receiver. This can sometimes clear corrupted settings and allow for a fresh programming attempt.
Always re-read your user manuals meticulously and ensure you are following each step precisely for your specific models.
The Convenience and Security of Car-Integrated Gate Openers
The benefits of programming your gate opener to your car are significant. You gain the convenience of operating both your gate and vehicle with a single, integrated system. This eliminates the need for multiple remotes cluttering your car and ensures gate access is always readily available whenever you’re in your vehicle.
This integration enhances security by reducing the risk of losing or misplacing separate gate remotes. Having gate control integrated into your car provides a streamlined and secure access solution.
Compatibility Check: Car and Gate Remote Systems
Before attempting to program your gate opener to your car, briefly check for compatibility. Most modern vehicles with built-in systems like HomeLink are designed to be compatible with a wide range of gate and garage door openers. However, it’s always wise to consult both your car’s owner’s manual and your gate opener’s documentation to confirm compatibility or identify any specific requirements. If unsure, consulting a professional installer or contacting the car or gate manufacturer’s support can provide clarity.
Maintaining Your Programmed Gate Remote System
Once your gate remote is successfully programmed and integrated with your car, proper maintenance is key to ensuring long-term reliability and performance.
Regular Check-ups for Your Gate Remote and System
Perform periodic checks of your gate remote and the overall system:
- Battery Inspection: Regularly inspect the battery compartment of your remote for corrosion or damage. Replace batteries preemptively or at the first sign of weakening signal strength.
- Remote Cleaning: Clean the exterior and buttons of your remote regularly to prevent dirt and debris buildup, which can interfere with button operation.
- Range Testing: Periodically test the operating range of your remote to ensure consistent signal strength. Reduced range can indicate battery issues or potential receiver problems.
Addressing Battery Issues Promptly
Battery problems are the most common cause of gate remote malfunction. If you notice decreased range, intermittent operation, or unresponsiveness, replace the batteries immediately. Use the correct battery type as specified in your user manual and ensure proper polarity when inserting new batteries.
Conclusion: Seamless Access at Your Fingertips
Programming your gate opener to your car is a worthwhile endeavor that significantly enhances convenience and security. By following this comprehensive guide, you can confidently integrate your gate access with your vehicle, enjoying seamless operation with the push of a button. Remember to consult your specific user manuals for detailed instructions and always prioritize safety during the programming process.
For a wide selection of gate remotes and access control solutions, visit https://elitegates.net/collections/remote-controls. And for expert advice and assistance with your gate opener needs, trust the team at cardiagnostictool.store – your partners in automotive and access control expertise.