
In today’s fast-paced world, convenience and security are paramount, especially when it comes to accessing your property. If you’re wondering, “Can You Program A Gate Remote To Your Car?”, the answer is a resounding yes! Integrating your gate remote with your vehicle offers an unparalleled level of ease, allowing you to control your gate without fumbling for a separate device. This guide, brought to you by the experts at cardiagnostictool.store, will walk you through the process of programming your gate remote to your car, ensuring seamless access and enhanced security for your home.
Understanding Gate Remote Programming Basics
Before we delve into the specifics of programming a gate remote to your car, it’s crucial to understand the fundamental principles of gate remote programming. This process essentially involves establishing communication between your handheld remote and your gate’s receiver unit. By successfully programming your remote, you create a secure and reliable link that enables you to operate your gate from a distance.
What is Gate Remote Programming?
Gate remote programming is the process of configuring your remote control to communicate with the receiver unit of your gate operator. The receiver unit, typically located near your gate motor, acts as the central hub that interprets signals from your remote. When you press a button on your programmed remote, it sends a unique signal to the receiver, instructing the gate to open or close.
Why Program Your Gate Remote?
Programming your gate remote is essential for several reasons:
- Convenience: Imagine arriving home and effortlessly opening your gate with a press of a button in your car, without having to reach for a separate remote.
- Security: Properly programmed remotes ensure that only authorized devices can operate your gate, preventing unauthorized access to your property.
- Customization: Programming allows you to personalize settings, potentially including unique access codes and specific operational features depending on your remote and gate system.
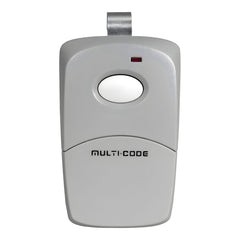
Alt text: Multicode dip switch gate remote for programming, showcasing a common type of remote requiring manual code setting.
Tools You’ll Need for Gate Remote Programming
To program your gate remote, especially when integrating it with your car, you’ll need to gather a few essential tools. Having these ready will streamline the process and prevent unnecessary delays. Typically, you’ll need:
- Your Gate Remote: The remote you intend to program to your car and gate.
- Your Car’s User Manual: This manual contains specific instructions on how to program devices to your car’s built-in remote system.
- Screwdriver (potentially): May be required to access dip switches on older remotes or the receiver unit.
- Ladder (potentially): If accessing the receiver unit requires reaching higher locations.
Always consult your gate remote’s user manual and your vehicle’s manual for specific tool requirements and safety precautions.
Step-by-Step Guide: How to Program Your Gate Remote to Your Car
Now, let’s get to the core question: how can you program a gate remote to your car? The process varies slightly depending on whether you have a fixed-code (dip switch) remote or a rolling code remote. We’ll cover both scenarios to ensure you have the information you need.
Identifying Your Gate Remote and Car System
Before you begin programming, it’s vital to identify the type of gate remote you have and understand your car’s built-in system capabilities.
- Gate Remote Model: Check your remote for a model number or manufacturer name. Refer to the user manual or the manufacturer’s website for specific programming instructions for your model. If you’re unsure, sending us a picture of your remote at cardiagnostictool.store can help us identify it and assist you.
- Car’s HomeLink® or Compatible System: Many modern cars come equipped with built-in systems like HomeLink® or similar universal remote systems. Consult your car’s user manual to determine if your car has such a system and how to access its programming mode.
Programming Fixed-Code (Dip Switch) Remotes to Your Car
Fixed-code remotes, often recognized by their dip switches, require a direct code match between the remote and the receiver. Programming these to your car involves a straightforward process:
- Ensure Your Remote is Working: Verify that your gate remote is functioning correctly and can operate your gate before attempting to program it to your car.
- Enter Car’s Programming Mode: Consult your car’s user manual for instructions on accessing the programming mode for your car’s built-in remote system. This usually involves pressing and holding one or two buttons in your car until an indicator light flashes. You might need to clear existing codes first, as instructed in your car’s manual (often by holding down two outer buttons for an extended period).
- Synchronize with Existing Remote:
- Hold your working gate remote close to the button in your car you wish to program.
- Simultaneously press the button on your existing gate remote and the chosen button in your car.
- Hold both buttons until your car indicates successful programming (usually a light flashing differently or becoming solid).
- Test: Test the programmed button in your car to ensure it now operates your gate.
Alt text: Linear DT1 dip switch remote, another example of a fixed-code remote, commonly used for gate and garage access systems.
Programming Rolling Code Remotes to Your Car
Rolling code remotes offer enhanced security by changing the code each time the remote is used. Programming these to your car requires a two-step process:
- Program Remote to Car (Step One – Synchronization):
- Ensure your rolling code gate remote is working with your gate.
- Enter your car’s programming mode as described in your car’s manual.
- Hold your working gate remote close to the car button you want to program.
- Press and hold the button on your gate remote and the chosen button in your car until the car indicates it has learned the signal (light flashes or changes).
- Program Car to Gate Receiver (Step Two – Learning):
- Go to your gate receiver unit. Locate the “Program” or “Learn” button on the receiver (consult your gate operator’s manual for location).
- Press the “Program” or “Learn” button on the receiver. An LED light on the receiver should illuminate.
- Return to your car and press and hold the car button you just programmed in Step One. Hold it until the gate receiver’s LED light flashes or turns off, indicating successful learning.
- Test: Test the programmed car button to confirm it now opens and closes your gate.
Alt text: LiftMaster 892LT rolling code remote, a secure type of remote that requires a two-step programming process for car integration.
Alt text: EG642 handheld rolling code remote, illustrating a common style of modern gate remote designed for secure access control.
Troubleshooting Common Gate Remote Programming Issues
Encountering issues while programming your gate remote to your car is not uncommon. Here are a few troubleshooting tips:
- Remote Not Syncing: Ensure your remote batteries are fresh and properly installed. Double-check that you are following the correct programming steps for your specific remote and car system.
- LED Light Not Blinking: If indicator lights are not behaving as expected, re-read the manuals to confirm you are in the correct programming mode. Try resetting your car’s system to factory defaults (refer to car manual) and start again.
- Gate Not Responding: After programming, if the gate doesn’t respond, repeat the programming steps carefully. Ensure you are within range of the gate receiver during the programming process, especially for the receiver “learn” step in rolling code systems.
- Compatibility Issues: In rare cases, your car’s system might not be fully compatible with your gate remote. Consult your car dealer or a professional gate technician for advanced troubleshooting or compatibility solutions.
Benefits of Integrating Your Gate Remote with Your Car
Successfully programming your gate remote to your car offers significant advantages:
- Ultimate Convenience: Control both your car and gate with a single, integrated system. No more juggling multiple remotes!
- Enhanced Security: Reduce clutter and potential loss of separate remotes, streamlining your access control.
- Streamlined Access: Open your gate as you approach your property without taking your hands off the wheel, improving safety and ease of entry.
Maintaining Your Car Gate Remote Setup
Once you’ve programmed your gate remote to your car, a little maintenance will ensure long-term reliability.
Regular Check-ups for Your Gate Remote
- Battery Checks: Periodically check your gate remote’s battery. Replace batteries proactively to avoid unexpected failures.
- Cleanliness: Keep your remote clean and free from dirt or debris that could interfere with button operation.
Dealing with Battery Issues
If your car’s programmed gate remote becomes unresponsive, battery issues are the most likely culprit. Replace the batteries in your gate remote as needed, following the manufacturer’s instructions.
Conclusion
Programming your gate remote to your car is a worthwhile endeavor that significantly enhances convenience and security. By following this guide, you can confidently tackle the process and enjoy the benefits of integrated access control. Remember to consult your specific user manuals for the most accurate instructions and, for any further assistance or to explore our range of gate remotes, visit us at cardiagnostictool.store. Enjoy the ease of controlling your gate right from your car!