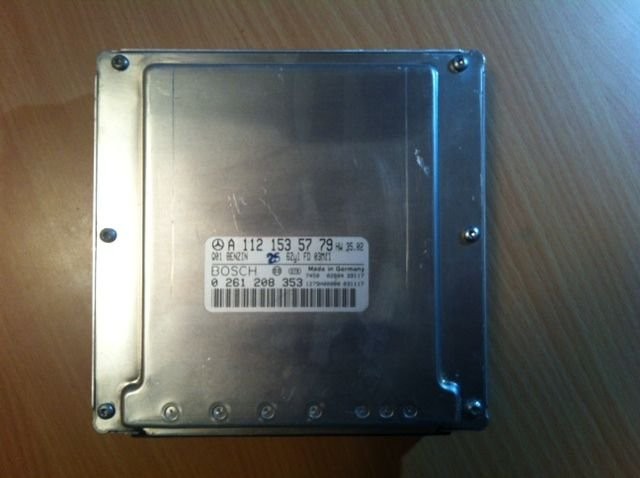
Experiencing car trouble and suspecting your Engine Control Unit (ECU) might be the culprit? It’s a frustrating situation, and while ECU failures aren’t the most common issue, they can certainly bring your vehicle to a standstill. Before you rush to replace it, consider the possibility of repairing or, more specifically, cloning your existing ECU. This Car Ecu Repair Manual will guide you through the process of ECU cloning, a technique that can save you time and money compared to a full replacement and reprogramming.
Understanding ECU Issues and When to Consider Repair
Your car’s ECU is essentially its brain, managing a vast array of engine functions. While robust, ECUs can fail due to various reasons, including electrical surges, water damage, or even just old age. Symptoms of a failing ECU can be diverse, ranging from intermittent engine performance issues and stalling to a complete no-start condition. Warning lights on your dashboard, especially the check engine light, might illuminate, often accompanied by error codes that a diagnostic scan tool can reveal.
However, it’s crucial to properly diagnose the problem before assuming ECU failure. Many other issues, such as wiring problems, sensor malfunctions, or fuel delivery issues, can mimic ECU problems. A thorough diagnostic process, ideally by a qualified mechanic, is essential to pinpoint the root cause. If the diagnosis points to a faulty ECU, then exploring repair or cloning becomes a viable option.
Step-by-Step ECU Cloning Guide
ECU cloning, or duplication, involves copying the data from your original ECU to a used ECU. This is particularly useful as it avoids the need for complex reprogramming to match your car’s immobilizer and other systems. Here’s a step-by-step manual to guide you through the ECU cloning process. Disclaimer: This guide is for informational purposes and should be undertaken with caution. If you are not comfortable with electronic repairs, seek professional assistance.
What You’ll Need
Before starting, ensure you have the following:
- Your original car ECU and a compatible used ECU (ideally from the same car model and transmission type).
- A set of screwdrivers to open the ECU casings.
- A Stanley knife or similar thin blade for separating glued components.
- An Eprom Reader/Programmer compatible with 5P08C Eprom chips (or similar chip type in your ECU).
- A computer with USB port for the programmer and data storage.
- A USB drive to save the ECU data.
Step-by-Step Instructions
-
Accessing the ECU: Locate your car’s ECU. Its location varies by vehicle model but is often found in the engine bay, under the dashboard, or behind the glove compartment. Consult your car’s service manual for the precise location.
-
Removing the ECU Cover: Carefully unscrew and remove the cover from your original ECU. Be gentle to avoid damaging the casing or internal components.
-
Separating the Circuit Board: Once the cover is off, you’ll see the circuit board. In some ECUs, the board might be glued to the lid with mastic, especially at the edges. Carefully use a Stanley knife to gently separate the circuit board from the lid. Slide the knife between the board and the lid to break the adhesive bond.
-
Locating the 5P08C Eprom: Identify the 5P08C Eprom chip on the circuit board. This chip, often circled in red in diagrams (like the original article), contains crucial vehicle identification and coding data. Pin 1 of the Eprom is usually marked with a dot or notch in yellow.
-
Reading Data from Original ECU: Connect your Eprom Reader/Programmer to the 5P08C chip on your original ECU. Ensure correct pin alignment, referring to the programmer’s manual. Use the programmer to read the binary file from the 5P08C chip and save it to your computer and a USB drive as a backup. This binary file is the key to cloning your ECU.
-
Writing Data to Donor ECU: Disassemble the donor ECU in the same way as your original ECU. Connect the Eprom Reader/Programmer to the 5P08C chip on the donor ECU. Use the programmer to write the binary file you saved from your original ECU onto the 5P08C chip of the donor ECU. This effectively clones your original ECU data onto the used unit.
-
Reassembling and Testing: Reassemble both ECUs. You usually don’t need to reapply mastic. Install the cloned ECU back into your car and try starting the engine. If the cloning process was successful and the donor ECU is compatible, your car should start.
Important Considerations & Alternatives
- Check for Underlying Issues: Before installing the cloned ECU, it’s vital to investigate what might have caused the original ECU failure. A wiring short or other electrical fault could damage the new ECU as well.
- When Cloning Might Not Be Suitable: If your original ECU is severely damaged or unreadable, cloning might not be possible. In such cases, you might need to purchase a new ECU and have it professionally programmed to your vehicle using specialized software like Mercedes STAR DAS (Xentry) for some car brands.
- Professional ECU Repair/Programming: If you’re uncomfortable with DIY ECU cloning, many reputable electronic repair shops specialize in ECU repair and cloning services. They have the expertise and equipment to handle complex ECU issues.
Conclusion
Cloning your car’s ECU can be a cost-effective solution to get your vehicle back on the road. By following this car ecu repair manual, you can understand the process and potentially perform the cloning yourself. However, remember to proceed with caution, ensure accurate diagnosis, and consider professional help if needed. A successful ECU clone can save you from the complexities and expenses of buying and programming a brand new ECU, offering a practical approach to car computer repair.

