
Replacing a car battery is often seen as a task for mechanics, but it’s actually quite straightforward and can be done at home. While owners of brand-new cars might not think about battery replacement just yet, it’s a common maintenance task for vehicles aged 2-5 years and especially for those who have recently purchased a used car.
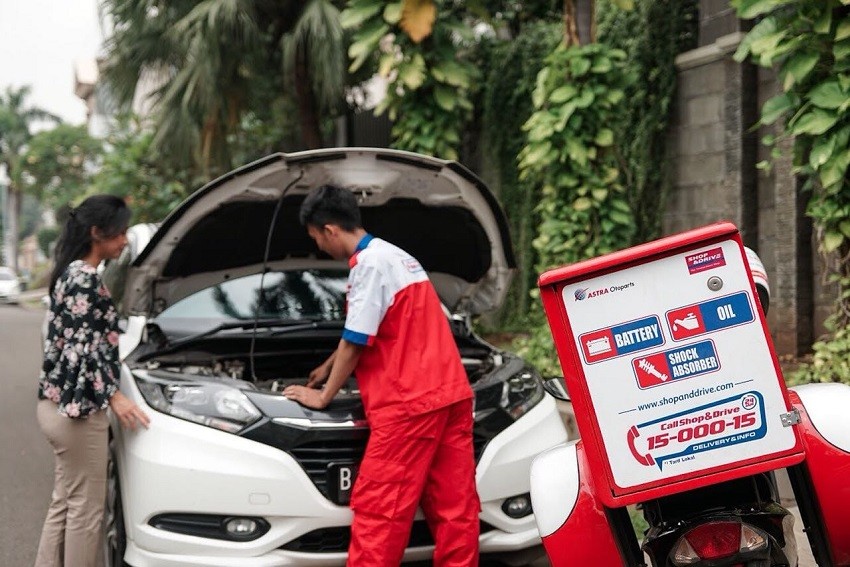
Car battery replacement and oil change service at automotive center.
The car battery is crucial for providing the electrical current needed to start your vehicle and power its electrical systems. When a battery starts to weaken, your car will usually show warning signs before it completely fails. However, replacing a battery in modern cars, particularly those with fuel injection and advanced electronics, is different from older, non-injection models.
A critical point to remember is that improper battery replacement in modern vehicles can lead to Electronic Control Unit (ECU) issues. Therefore, specific steps are necessary to ensure a smooth and problem-free battery change. Many car owners are unaware of these crucial steps.
Let’s explore the correct way to replace car batteries in both injection and non-injection vehicles, ensuring you avoid any ECU-related headaches.
Replacing a Car Battery in Non-Injection Cars (Older Models)
Changing the battery in older, non-injection cars is generally a simple process that doesn’t require specialized skills. Here’s a step-by-step guide:
-
Prepare Wrenches
The first step is to gather your tools. You’ll need wrenches, typically size 12 or 14, to loosen the nuts on the battery terminal clamps. Ensure your engine is completely turned off before you begin. With the engine off, you can safely disconnect the battery terminals.
-
Disconnect the Negative Terminal First
It’s crucial to disconnect the negative (-) terminal first, which is usually black. This precaution helps prevent accidental short circuits if your wrench happens to touch a grounded part of the car while still connected to the positive terminal. After removing the negative terminal, proceed to disconnect the positive (+) terminal, which is usually red. Once both terminals are disconnected, carefully tuck the positive cable aside to ensure it doesn’t accidentally make contact with any metal parts of the car body.
-
Remove the Old Battery
With both terminals safely disconnected, you can now remove the old battery. Make sure to note the specifications of your old battery, such as the amp-hour (Ah) rating. When choosing a replacement, opt for a battery with the same or slightly higher Ah rating. Avoid using a battery with a lower Ah rating than recommended for your vehicle.
Visual guide for replacing a car battery, emphasizing terminal connections.
-
Clean the Battery Tray
If you previously used a wet-cell battery, you might find white residue or corrosion on the battery tray. Before installing the new battery, it’s a good idea to clean this area. Use a wire brush or an old toothbrush to remove any dirt or corrosion. Inspect the battery tray for any signs of rust, especially if you’ve been using a wet-cell battery, as battery acid can cause corrosion over time.
-
Install the New Battery
Place the new battery into the cleaned tray. Position it correctly, matching the orientation of the old battery. Ensure it sits securely and doesn’t wobble.
-
Connect the Battery Terminals
Now, connect the battery terminals, starting with the positive (+) terminal first. Make sure the terminal clamp is securely tightened. After the positive terminal is secure, connect the negative (-) terminal and tighten its clamp as well. When tightening the terminals, ensure your wrench doesn’t accidentally touch any metallic parts of the car body to prevent short circuits.
Side-by-side image showing battery replacement on older versus newer car models.
Once both terminals are firmly attached, double-check that all connections are snug and secure. Finally, replace the positive terminal cover, if available. If not, you can use a plastic cap or rubber protector to prevent accidental contact with metal components. With everything properly connected, your car is ready to start. Start the engine and let it run for about 10 minutes to allow the alternator to properly charge the new battery.
Replacing a Car Battery in Injection Cars (Modern Models)
Replacing the battery in modern, fuel-injected cars requires a slightly different approach, especially due to the sensitive electronic systems and the ECU. For many European and modern vehicles with extensive electronic systems, it’s recommended to maintain a power supply to the car’s electrical system while changing the battery.
-
Prepare Jumper Cables and a Spare Battery
For this method, you will need jumper cables and a spare battery. These items are readily available at auto parts stores and online.
Animated illustration showing correct jumper cable connection sequence during battery replacement.
Connect the red (+) jumper cable to the positive terminal of the old battery and the positive terminal of the spare battery. Then, connect the black (-) jumper cable to the negative terminal of the old battery and a grounded metal part of the car’s body, like the hood latch or fender. With this setup, the spare battery will maintain power to the car’s systems while you replace the main battery. You can now carefully disconnect the terminals of the old battery.
-
Clean the Battery Tray
Once the old battery is removed, take the opportunity to clean the battery tray and inspect it for corrosion. If you find any rust, clean the area with a wire brush and consider applying some rust-inhibiting paint to prevent further corrosion. After cleaning and treating any rust, you can install the new battery in the tray.
-
Tighten Battery Terminals
Install the new battery and tighten the terminal connections. Start by connecting and tightening the positive (+) terminal first, followed by the negative (-) terminal.
Image depicting potential car battery issue related to prolonged traffic conditions.
When tightening the terminals, be careful not to let your wrench touch any grounded metal parts to avoid sparks or short circuits. Take your time to ensure a secure connection without over-tightening.
-
Disconnect Jumper Cables
After ensuring the new battery is securely installed and terminals are tight, you can disconnect the jumper cables. Disconnect the black (-) cable from the car body ground first, then from the spare battery’s negative terminal. Next, disconnect the red (+) cable from the new battery’s positive terminal, and finally from the spare battery’s positive terminal.
This method is commonly used for modern car battery replacement to prevent memory loss in electronic systems like power windows, clock settings, head unit presets, and other electronic devices. More importantly, it minimizes the risk of disrupting the ECU when the car battery is completely disconnected.
Close-up of a car battery showing signs of neglect and lack of maintenance.
In some modern cars, ECU damage has been reported after battery replacement without maintaining power. For vehicles with advanced electronic systems, using the jumper cable method is highly recommended.
If you don’t have jumper cables and a spare battery, it’s best to seek professional battery replacement services from a reputable auto shop. Alternatively, if you proceed with a standard battery replacement without maintaining power, consider having your car scanned at a service center afterward to reset any settings that may have been lost due to the power disconnection. This will ensure all systems are functioning correctly after the battery change.