As a car owner, you might encounter situations where your Honda’s Engine Control Unit (ECU) needs a reset. Whether you drive a Honda Civic, Accord, or even a Honda City i-DSI, understanding how to reset your ECU can be beneficial. Resetting your car’s computer can address issues like a sudden drop in fuel economy, help your vehicle adapt after installing new performance parts, or clear a persistent check engine light. This guide provides a straightforward method to reset your Honda ECU, ensuring your car runs smoothly.
Before you begin, gather these materials:
- Fuse puller or needle nose pliers (for easy fuse removal)
- Code reader (optional, for diagnosing trouble codes before resetting)
Step 1 – Accessing the Fuse Box in Your Honda
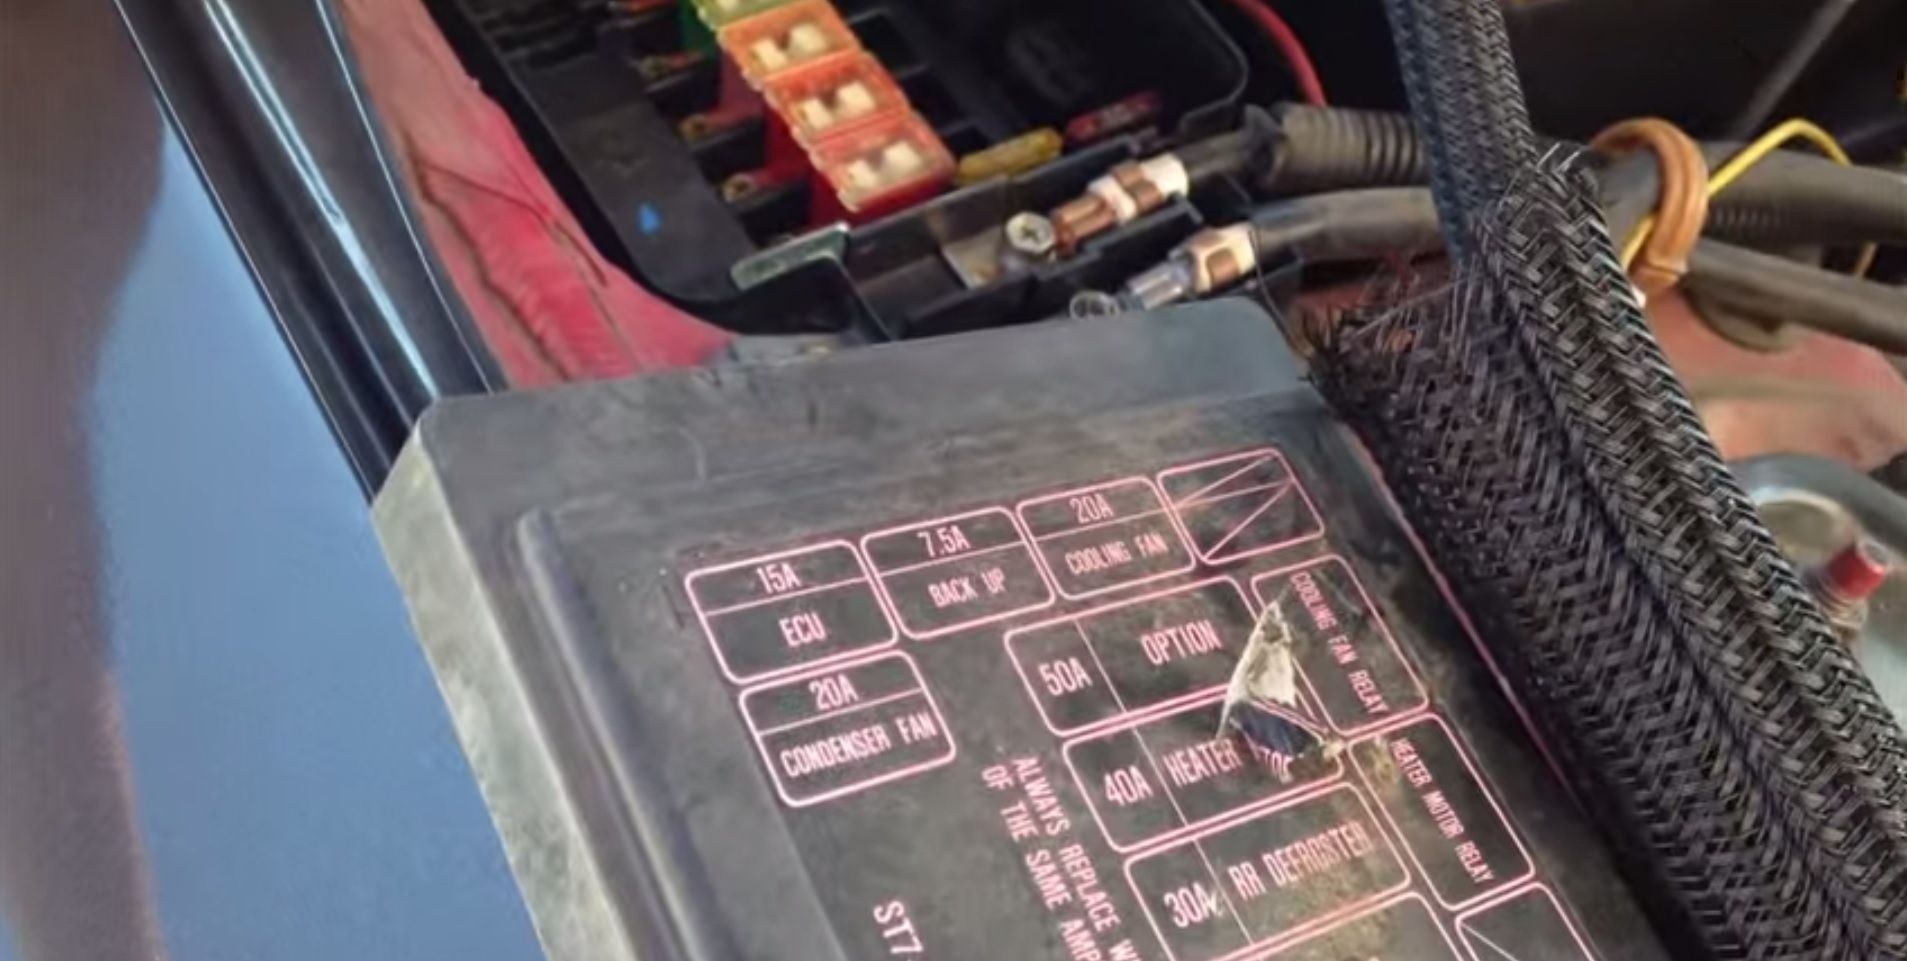
The first step is to locate the fuse box in your Honda. Typically, you’ll find it under the hood, usually on the passenger side of the engine bay. Look for a black plastic box with a removable cover. This cover is crucial because it contains a fuse diagram. This diagram is a map that labels each fuse and its corresponding system, along with its amperage rating. To open the fuse box, gently push the retaining tabs outward and lift the cover off. Place the fuse box cover aside in a safe location where it won’t get lost or damaged.
Step 2 – Removing the Necessary Fuses to Reset the ECU
While some suggest disconnecting the negative battery terminal for an ECU reset, this method resets everything in your car, including your radio presets and other settings. A more targeted approach is to remove specific fuses. Using your fuse puller or needle nose pliers, carefully remove the following two fuses from the fuse box:
- 7.5A fuse labeled “Back-Up”: This fuse maintains the ECU’s memory and clock.
- 15A fuse labeled “ECU”: This fuse directly powers the Engine Control Unit.
Once you have removed these two fuses, it’s important to wait for approximately 10 minutes. This waiting period allows the ECU to fully discharge and lose its stored memory, effectively performing the reset.
Step 3 – Re-installing Fuses and Testing the Reset
After waiting for ten minutes, proceed to re-install the fuses you removed. Place the 7.5A “Back-Up” fuse and the 15A “ECU” fuse back into their original slots in the fuse box. Ensure they are firmly seated. Then, replace the fuse box cover, making sure it clicks securely into place.
Now, start your Honda and check the dashboard for the check engine light. If the light is no longer illuminated, it’s possible the reset has resolved a temporary or false error. To confirm, take your car for a short drive to see if the check engine light reappears. If the light stays off, the issue might have been resolved by the ECU reset. However, if the check engine light comes back on, it indicates a persistent problem that requires further diagnosis and repair. In such cases, it’s recommended to use a code reader to identify the specific trouble code and consult a qualified mechanic for professional assistance.
By following these steps, you can effectively reset your Honda ECU, which is a useful troubleshooting step for various car performance issues. Remember, while resetting the ECU can resolve certain problems, it’s essential to address underlying mechanical or electrical issues if the problems persist.