
For owners of modern Honda Beat motorcycles, understanding the fuel injection system is crucial for optimal performance and troubleshooting. These bikes utilize an Engine Control Unit (ECU) to digitally manage fuel and air mixture. When issues arise within this system, your Honda Beat cleverly communicates through blink codes on the speedometer. As a Honda motorcycle repair specialist at cardiagnostictool.store, this guide will walk you through understanding these codes and, more importantly, how to perform a Honda Beat ECU reset to potentially resolve common problems and restore your bike’s performance.
Understanding Honda Motorcycle Injection Error Codes Displayed on MIL.
Before rushing to a mechanic, learning to interpret these Malfunction Indication Light (MIL) flashes can save you time and money. The blinking patterns, whether long, short, or rapid, indicate the type of issue within the injection system. Resetting the ECU and Throttle Position (TP) system is often marked by a continuous or rapid blinking light. Often, problems can be as simple as a disconnected sensor wire. In such cases, reconnecting the wire and performing an ECU reset can get you back on the road quickly.
If the MIL light remains off, it suggests the issue might not be within the injection system itself. Problems like a sputtering engine, difficulty starting, a dirty air filter, or a worn-out spark plug could be the culprits. Replacing these components might solve the issue. However, if performance doesn’t return to normal after addressing these common issues, an ECU reset is likely necessary. This process recalibrates the system, allowing it to relearn and optimize the air-fuel mixture for peak engine performance.
Decoding MIL Blinks: Honda Injection System Error Codes
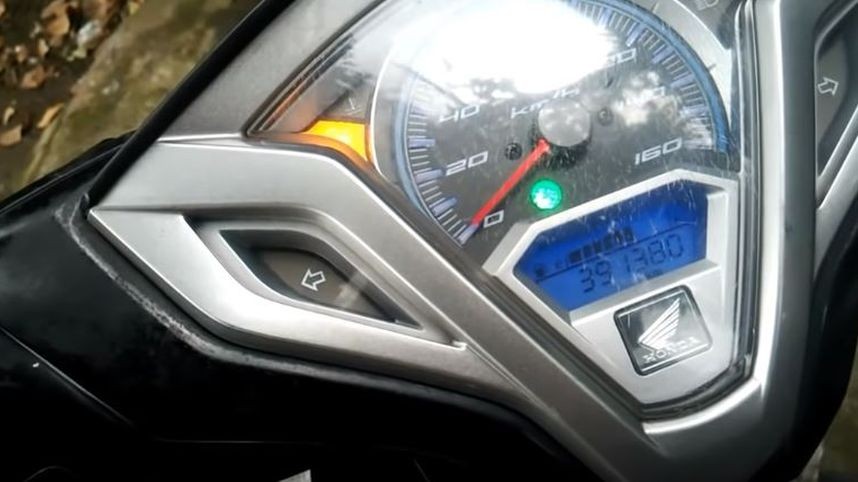
MIL Flashing Patterns Indicate Fuel Injection System Issues on Honda Bikes.
A constantly flashing MIL when the ignition is ON indicates a problem requiring inspection and repair within the fuel injection system. While Honda injection systems are generally reliable, common issues can arise, such as a malfunctioning idling stop system or unstable engine idling. Problems with the Engine Oil/Coolant Temperature sensor (on liquid-cooled models) or, critically, the Crankshaft Position (CKP) sensor can also occur. A CKP sensor failure can lead to engine stalling and difficulty starting. Therefore, paying attention to MIL blinks is essential for timely issue resolution.
Ignoring these warning signals and simply resetting the ECU without addressing the underlying problem is a common mistake. While resetting might temporarily clear the light, it doesn’t fix the root cause of the issue.
Here’s a breakdown of common Honda MIL blink codes and their corresponding sensor or component:
- 1 blink: MAP sensor (Manifold Absolute Pressure)
- 7 blinks: EOT/ECT sensor (Engine Oil/Coolant Temperature)
- 8 blinks: TP sensor (Throttle Position)
- 9 blinks: IAT sensor (Intake Air Temperature)
- 11 blinks: Speed sensor
- 12 blinks: Injector
- 21 blinks: O2 sensor (Oxygen)
- 33 blinks: ECM (Engine Control Module)
- 52 blinks: CKP sensor (Crankshaft Position)
- 54 blinks: Bank Angle sensor
Reading these codes is straightforward. Long blinks represent the tens digit, and short blinks represent the units digit. For example, code 11 (speed sensor) is indicated by one long blink followed by one short blink, repeated after a brief pause.
Even without error codes, periodically resetting the ECU is beneficial. Over time, the ECU’s learned parameters for throttle valve position can drift due to wear and tear around the throttle body. Resetting helps the ECU re-adapt to the current conditions and maintain optimal performance.
Why Perform a Honda Beat ECU Reset? Preventing Injection System Issues
With regular use, the ECU’s fuel and air mixture calculations can become less accurate. This can be caused by factors like dust accumulation in the air filter or degradation of the spark plug. These changes in air supply and combustion efficiency can confuse the ECU, making it harder to determine the ideal fuel-air ratio.
Resetting the injection system is applicable to both ESP and non-ESP Honda Beat models, as well as other Honda scooters and motorcycles using fuel injection. This simple procedure helps restore engine performance to its factory settings.
Benefits of ECU Reset
An ECU reset effectively clears the ECU’s memory, erasing all learned adaptations accumulated over time. The system then restarts its learning process based on the current engine conditions. After an ECU reset, it’s also recommended to reset the Throttle Position (TP) sensor.
Resetting the TP sensor ensures the idle setting is correctly recalibrated when the throttle is fully closed. This combination of ECU and TP reset optimizes the fuel injection system, ensuring it operates according to your Honda Beat’s current state.
Step-by-Step Guide: How to Reset Your Honda Beat ECU
Diagnostic Link Connector (DLC) Socket Location for ECU Reset on a Honda Beat.
To reset the ECU, first locate the Diagnostic Link Connector (DLC) socket. Its position varies by model; it might be under the seat, behind the front cover, or in the glove box area. The socket is typically red and capped, not connected to anything else.
- Access the DLC Socket: Carefully pry open the DLC socket cover using a small flat-head screwdriver. It might be a bit tight. You’ll see four connector slots inside.
- Identify the Reset Terminals: Position the socket with the locking clip facing upwards. Locate the two vertical slots on the left side of the clip. These are the terminals you’ll use for the reset. For convenience, specialized ECU reset tools are available online, designed to plug directly into this socket.
- Prepare a Jumper: If you don’t have a specialized tool, you can use a modified paperclip or a small pin to create a jumper wire.
- Connect the Jumper: With the ignition OFF, insert the jumper wire into the identified terminals of the DLC socket.
- Turn Ignition ON: Turn the ignition key to the ON position. Observe the MIL light. If there are no existing issues, the MIL should illuminate and stay lit without blinking.
- Disconnect and Reconnect Jumper: Remove the jumper wire from the socket for about three seconds, and then immediately reconnect it.
- Check MIL Light: Watch the MIL light. If the ECU reset is successful, the MIL light should turn off completely and remain off. If it’s continuously blinking rapidly, the reset has also likely been successful.
- Turn Ignition OFF: Turn the ignition key back to the OFF position. The ECU reset process is now complete.
- Proceed to EOT Reset: Continue with the EOT reset procedure as outlined below.
Troubleshooting ECU Reset Failures
If the ECU reset fails, it’s often indicated by a code 7 blink pattern on the MIL, pointing to a potential issue with the EOT/ECT sensor circuit. If this happens:
- Inspect Connections: Double-check all socket connections to ensure they are secure.
- Repeat ECU Reset: Repeat the ECU reset procedure as described above.
- Observe MIL Light: This time, when you turn the ignition ON with the jumper connected, the MIL should remain off.
- Disconnect and Reconnect Jumper: Remove the jumper for three seconds and reconnect.
- Verify Reset: If the MIL light then blinks continuously, the ECU reset is now successful.
- Final Check: Turn the ignition OFF, then ON again. The MIL should illuminate steadily (no blinking) if the ECU reset is successful and no other issues are present.
- Remove Jumper: Turn the ignition OFF and remove the jumper wire from the DLC socket. Replace the socket cover.
Resetting the EOT Sensor for Engine Temperature Adjustment
Engine Oil Temperature (EOT) Sensor Socket Location on the Cylinder Head for Reset.
After the ECU reset, resetting the Engine Oil Temperature (EOT) sensor is the next step. The EOT sensor, located on the cylinder head, measures engine temperature and provides crucial data to the ECU.
- Locate EOT Sensor Socket: Find the EOT sensor socket on the cylinder head. It’s typically a smaller black socket.
- Prepare a Smaller Jumper: Use a smaller jumper wire or pin that fits into the EOT sensor socket terminals. Do not use the same jumper from the ECU reset.
- Disconnect EOT Socket: Disconnect the black EOT sensor socket from the cylinder head sensor.
- Connect Jumper to EOT Socket: Connect the jumper wire to the terminals of the disconnected EOT sensor socket (the socket you just removed from the sensor).
- Turn Ignition ON: Turn the ignition key to the ON position for three seconds.
- Disconnect Jumper: Remove the jumper wire from the EOT socket.
- Verify EOT Reset: Successful EOT reset is indicated by the MIL blinking rapidly and continuously, similar to turn signals.
- Turn Ignition OFF: Turn the ignition key to the OFF position.
- Reconnect EOT Socket: Reconnect the black EOT sensor socket back to the EOT sensor on the cylinder head.
- Final Check: Ensure both the EOT sensor socket and the ECU socket are properly reconnected and covers are replaced.
With both ECU and EOT resets completed, your Honda Beat’s fuel injection system should be fully recalibrated, optimizing engine performance.
Download Carmudi App to Explore New and Used Cars & Bikes and Latest Automotive News!